I believe there are no woodcarvers who don’t remember making spoons as beginners. It’s kind of a tradition in the woodcarving world. There are several reasons spoons are great for practicing wood carving Palm Tools. First of all, they are simple to make and are a great way to try out different types of chisels and knives.
On the other hand, spoons are practical objects, so the possibility to give them as a gift to your mum after you finish your work is additional motivation for you as a young carver.
If you are wondering what are the common components of a beginner’s spoon carving set, that’s exactly what you are about to find out.
What Does A Spoon Carving Set Consist Of?
I’ll be clear from the start: there is no standard spoon carving set. There are of course some tools you need to have, but there is no rule on what should be inside. Every carver has to decide what he or she needs, and then buy tools accordingly.
So, you can choose. Good examples of simplicity and good quality are some BeaverCraft sets. They usually come at a very decent price (around 40-50 dollars, depending on diversity of the set), and never leave you without essentials. And essentials are:
- straight knives
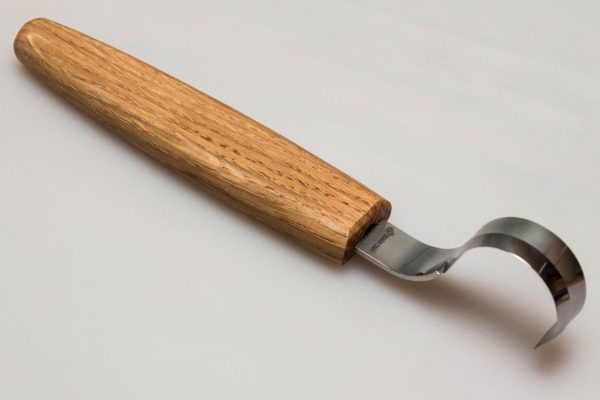
- hook knives
- sharpening equipment (a leather strop and sharpening compound)
At an additional price, you can get several more or less shaped wood chunks for you to carve in, protective finger tape, sandpaper, wax oil etc.
And that’s it, you don’t need much more than that to carve out a spoon, unless of course you have some crazy new design in mind.
Remember that, in case you are lefthanded, the hook knives should be adjusted to that. I know that most brands produce hook knives for the lefthanded, that’s not the problem, just make sure that you checked that before ordering.
What Is The Best Spoon Carving Set?
Your choice of spoon carving tools will depend on several criteria. Firstly, it’s your skill level. If you are just trying out how it feels to carve some wood, then you don’t need a set as diverse as professional craftsmen holding a shop where they sell hand-made spoons.
Quality is of course something very important. If you are a professional, and have a large number of carving projects you have to do daily, then you probably want to invest in some good tools, possibly branded and proven to be durable. Things change if you are a beginner, or you carve just for fun. Then such investments might not be necessary.
Finally, your budget is an important factor as well. High prices, unfortunately, don’t mean high quality, so before buying any spoon carving toolkit, make sure you read some customer reviews or blog posts about the product. Other people’s experiences can help you decide on the best price-quality ratio.
How Do I Carve A Spoon?
Once you get the tools, the next thing is to decide on the wood type. For the newbies, basswood is widely recommended. It’s because it is particularly easy to process. However, as soon as you get some experience and skill, try some hardwoods as well. They are more durable and temperature resilient than softwoods, which are characteristics we want for kitchen utensils.
Then, the next step is to draw your spoon on the wood chunk and – start cutting! First, you will cut to do the rough shaping, just to outline your project. Once it starts looking something like a spoon, you will get onto detail cutting. Then comes the most important part: making the spherical hole, which is the main attribute of a spoon. You will do this with the hook knife.
Finally, when there’s nothing else to remove, you will take the sandpaper to polish the surface, and finally put wax oil on it, to protect the wood from any chemical damage.
And that’s it! You have a new spoon to make risotto with.
Summary
Carving spoons is easy if you have the right tools. Luckily, these tools are easy to find and use, and are usually quite cheap. When it comes to spoons, don’t worry about your skills. Anyone can do it. Just take care not to cut yourself and have fun!